Setting Up Your Integration with CultureAmp
How to set up the Namely/CultureAmp integration.
CultureAmp offers a delivered one-way integration from Namely to CultureAmp. This data can then be used to select employees as survey participants and link demographic information to survey results for detailed analysis. Changes made to employee data in CultureAmp will be overridden at the next sync.
Configuring the Namely Report
The integration uses the Reports object from the Namely API to pull your employee data into CultureAmp. You should create a personalized report in Namely that has your required fields. At a minimum you must include:
-
Name: Available in the report under the Add Column section. In the report, this will appear as the Full Name column
-
Email: Available in the Add Column section
-
User Status: Available in the Add Column section
-
Departure Date: Available in the Add Column section
Note: When you first create a report, it will include the First Name and Last Name columns which you will need to remove in favor of using the Name field you added earlier.
Please include the Employee Number field to populate Employee ID if you populate Employee Number within Namely. If you don't use this field in Namely, the integration will simply use the Namely ID of each employee as the Employee ID within CultureAmp in order to match user records across syncs.
Optionally, you can include Preferred Name (profiles_preferred_name), Date of Birth (DOB) and Start Date (Start Date). Date of Birth and Start Date will be used for generating Age and Tenure Demographics. You can also include Language (Native Language) if you wish to set a preferred language for your employees. Please do not include the Language column as this will be read as a string of text and will not accurately set employees' preferred languages.
You can also include any other columns you wish to use as demographics, such as Department, Gender, or Country.
Now you can grab the report identifier for your personalized report. To get this, access your personalized report as normal. In your browser location bar you'll see something like https://acme.namely.com/reports/123-1af2-4ha. The Report ID number we need is the 123-1af2-4ha at the end.
Creating a Personal Access Token
To access the report from CultureAmp, you'll need to create a Personal Access Token.
To create your token:
-
Log in to Namely as the user account that you wish to use for the key creation.
-
Click on your Profile image in navigation menu.
-
Select API.
-
Select Personal Access Tokens.
-
Enter a token name into the text field and click Create.
-
Copy the value of the Personal Access Token created which will be in the form of 333e42ef58a08755f84aa4877399ca355639829d
Note: When creating this Personal Access Token, it's a good practice to do this from a user account that only has access to the data fields that you want to sync with Culture Amp. Please ensure that the user is not SSO-enabled, otherwise the sync will fail with the error message "Invalid access token provided." You'll need to share the personalized report with this user too. More information about the Personal Access Token is available in the Token Setup Knowledge article.
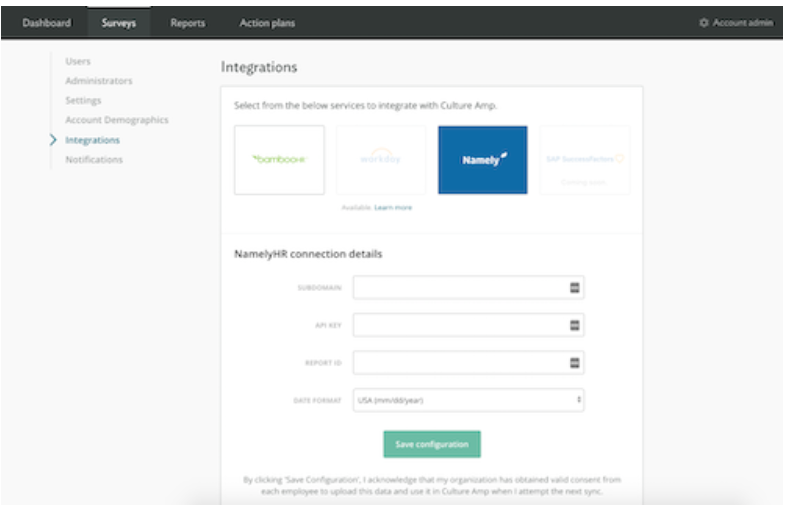
Once you have the report configured, you can enter the subdomain (you can find this in the web address when accessing Namely—it's the acme in http://acme.namely.com), Personal Access Token, and Report ID on the Integrations page.
Adding the Integration in Culture Amp
The integration can be configured in your account via the Integrations page under Account Administration
In order to get the integration up and running, you will need four pieces of information from your Namely account and personalized report:
-
Subdomain
-
Personal Access Token
-
Report ID
-
Date Format
You'll need to check your Namely account settings to confirm the date format for date fields in your Namely instance:
-
Log in to Namely.
-
Click on your Profile image in the navigation menu.
-
Select Settings.
-
Confirm the date format set on your account.
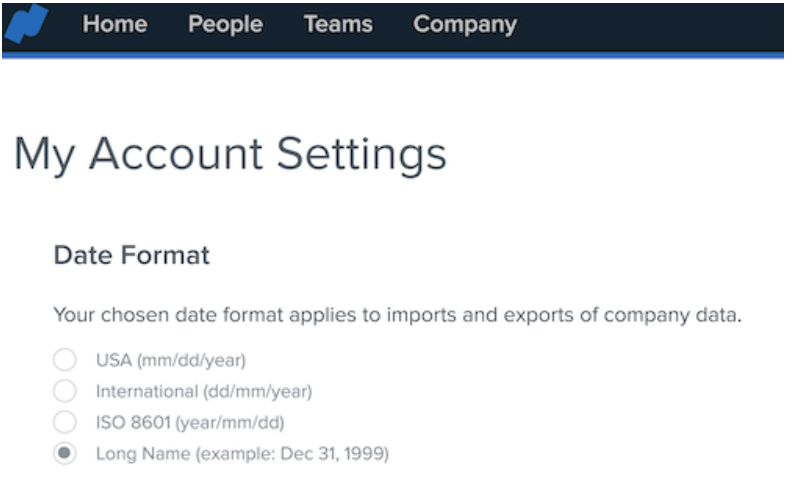
In CultureAmp, make sure the Date Format drop-down list on the Integrations page under Account Administration matches the appropriate date format you use in Namely. For example, if you use ISO 8601 (year/mm/dd) in Namely, set the Date Format to the same value in CultureAmp.
Syncing Your User Data
Once you've set up the Namely integration, you're now able to sync your user data into CultureAmp, which you can do from the Users page of your Account Administration.
Click on Import Users, then Sync.
Depending on the number of employees you have, this sync could take anywhere from a couple of seconds to a minute or two.
From here, CultureAmp will walk you through the same verification process as if you were uploading users via the Import Users process. If you'd like a refresher on the Import Users process.
Handling of inactive employees
All employees—active and inactive—will be imported. If an employee has a Termination Date, or a status of Inactive in Namely, they will be made inactive in CultureAmp. Any updates to inactive employees, such as a changed end date or any other update to demographic information, will be applied during the sync.
No changes will be made to employees with a user status of Pending Employee. These users will be treated as active or inactive based on their Start Date and/or End Date.
If an employee is active in CultureAmp but not present in your Namely report, they will be made inactive in CultureAmp.
The Namely sync logic will not cater for the following scenarios as inactive users are ignored during the sync:
-
An employee was deactivated with an incorrect termination date and the date was later corrected in Namely
-
The employee was deactivated with incorrect demographics and the demographics were later corrected in Namely
In these situations, the employee in CultureAmp will need to be re-activated, have their data corrected, and deactivated again. Alternatively, the employee in CultureAmp can be re-activated, then a Namely sync can be done to update the data and deactivate the employee.
NOTE:
Please contact support@cultureamp.com if you want to activate this integration.